| Creating
Animated surface in 3dx
Your going
to make a simple technique in making animated surfaces using
multiple attributes in a single object surface.
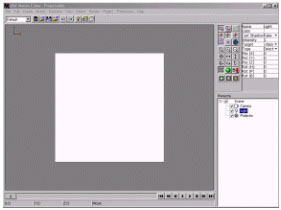
To start
with, open the 3da modeler and make a mesh with an H-1
and V-1 and check the square check box to make this
proportioned. Were going to use this as a projector for the
surface animation.
Make
at least 10 copies of the mesh, were going to make
this in 10 frames of loop animation so the attribute
must be exactly 10.
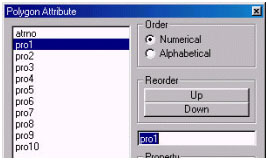
Apply
an attribute name for each object as pro1 up to pro10.
Attached
all the objects together and rename the newly combined object
as Projector.
Now you have a single mesh object with 10 attributes,
now save the file as Projector.3da.
Note:
before loading the file to Motion Editor, make sure that the
object is loacted at the center of the world axis.
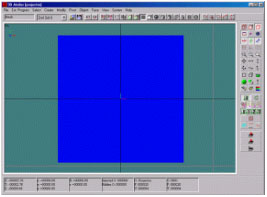
Load
the Projector.3da in Motion Editor, move the
camera for a better view of the object projector.
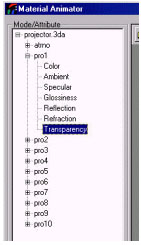
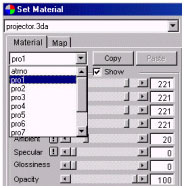
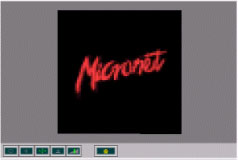
Open
the Set Material window and select pro1 attribute,
change the Opacity value to 100 (copy this setting
to all attributes) then apply the textures to each of the
attributes. Download the zip file protext.zip
(13.1KB) for the texture
images.
Note:
All texture images are already been named after the attribute
name and sequenced to exactly 10-images. When texturing attributes,
apply only the texture that carries the same name as the attribute.
Click Auto button to fit the object size to the texture image.
|
|
Apply
3 key frames for the Pro1 attribute.
On the track editor insert keys 1,2 then select
key 1 and input Transparency value to 0, this
will make the pro1 surface visible at key frame 1.
For attributes pro2 to pro10 apply the settings
as follows.
- For
pro2 insert keys 1,2,3 then
select key 2 and input transparency value to 0.
- For
pro3 insert keys 2,3,4 then
select key 3 and input transparency value to 0.
- For
pro4 insert keys 3,4,5 then
select key 4 and input transparency value to 0.
- For
pro5 insert keys 4,5,6 then
select key 5 and input transparency value to 0.
- For
pro6 insert keys 5,6,7 then
select key 6 and input transparency value to 0.
- For
pro7 insert keys 6,7,8 then
select key 7 and input transparency value to 0.
- For
pro8 insert keys 7,8,9 then
select key 8 and input transparency value to 0.
- For
pro9 insert keys 8,9,10 then
select key 9 and input transparency value to 0.
- For
pro2 insert keys 9,10,11 then
select key 10 and input transparency value to 0.
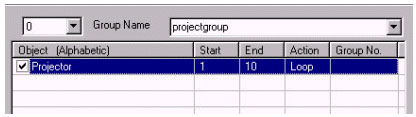
For
the Animation Group set-up, drag the object Projector
to the Object group list, then input 0 for Start
and 0 for End dialog box. Select Loop
for the Action. Rename the group as projectgroup.
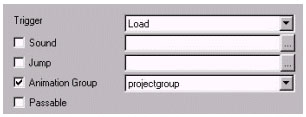
For
the Attributes\Events select Projectgroup for
the Animation Group, then select Load for the
Trigger.
After
finished setting, convert the scene to 3dx. After that you
can play your 3dx animation.
To
see more about this effect, down load sample 3dx files Island.zip
(120KB) and
TV.zip (122KB).
|